

Step by Step Fly agaric fungus
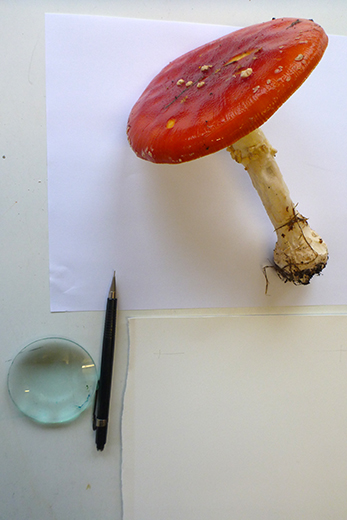
Natural history illustrators are quick to paint specimens that turn up on their doorstep. So when Dave Prescott of Herefordshire New Leaf appears with a beautiful fly agaric fungus (Amanita muscaria) I leap at the chance to paint it.
Drawing up the Fly agaric
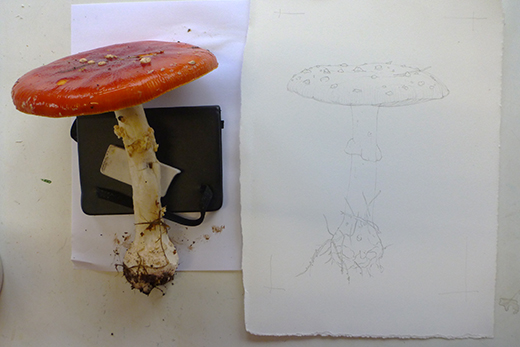
First up, draw it. I want to focus on the stem (stipe), so take reference from photos on how the ring (annulus) attaches to the stem. Then I draw it up in pencil. I like pentel P205 automatic pencils with an 0.5mm HB lead; and work onto fabriano artistico 100% cotton hot press paper.
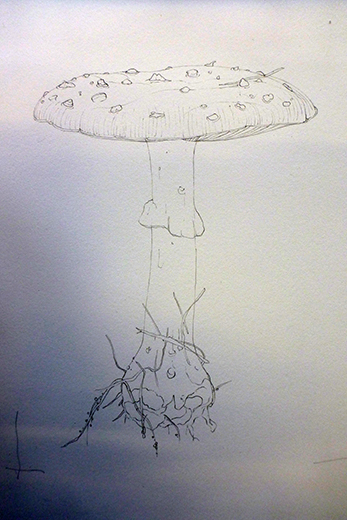
The stipe is being eaten by a slug, so I pin it back together with an insect pin, and prop it up on a pile of stuff. This means it holds its shape.
Painting the stipe (stalk) of the Fly agaric
I look at the stipe for a while before applying colour, and settle on a mix of yellow ochre, van dyke brown, and a touch of permenant violet. I favour daler rowney or winsor and newton watercolours, and always use my trusty series 7 sable watercolour brush (no.1 size).
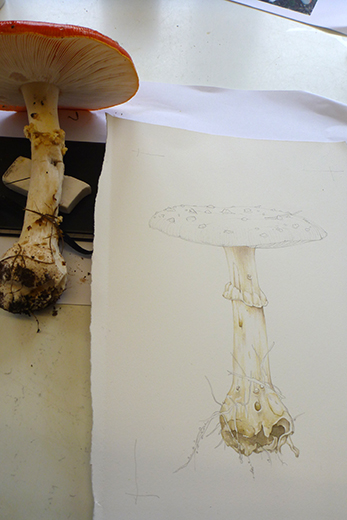
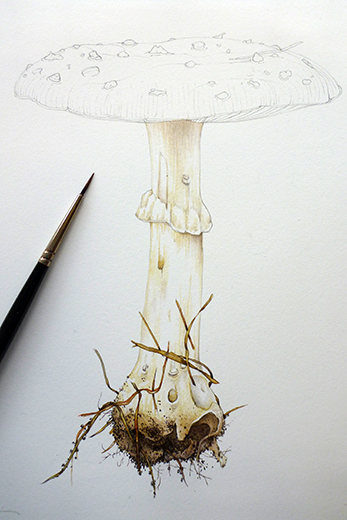
The base colour on the stipe is done. Next I work into the soil and grass attached to the stipe’s tacky surface, and the swollen base of the stipe. The soil is hard, lots of tiny dark brown spots. They’re not regular sizes but vary. Each area of earth has to be examined with a hand lens.
Illustrating the cap: Base colours
Next, I start work on the cap. I take the liberty of adding some extra white scales as there’s loads of variation within different specimens. Often they are far “spottier” than this one. I plot the basic colour, and make sure I leave any paler areas where the light falls as white. I’m using a mix of cadmium orange light and cadmium orange dark; along with a touch of yellow. As always, I build up the depth of colour with tiny repeated brush strokes; these follow the shape of the object (and direction of growth).
Painting the lighter areas of the Fly agaric cap
Working into the lighter areas, I stick to pure cadmium yellow light and make sure there are colour gradations by overlapping the orange areas with the yellow.
The white scales cast shadows as they’re raised and textured. I plot in these shadows and details.
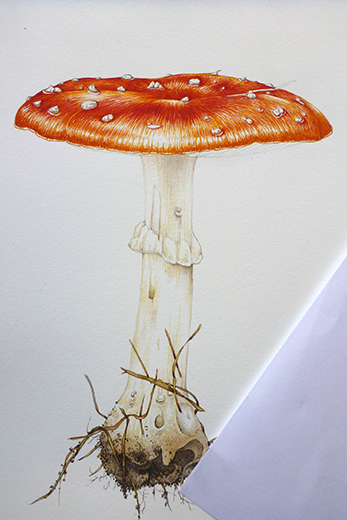
Working into the darks on the cap
Darks. I mix cadmium orange light and dark with alizarin crimson and layer on more colour. This time I only paint the very darkest areas of the cap. These are near the centre and edges.
Working more into the cap, I try to make the areas of dark and white less stark by using cadmium orange and yellow, and doing lots of overlapping strokes. I also put in the gills under the cap. As I progress it is necessary to keep looking at the tonal shodows on the stipe and darkening them too. This is done with a vandyke brown and yellow ochre mix.
I also make the grass attached to the stipe more orange than it is in reality. This is a trick which allows the viewer’s gaze to travel across the whole painting rather than getting stuck on one area of vibrant colour.
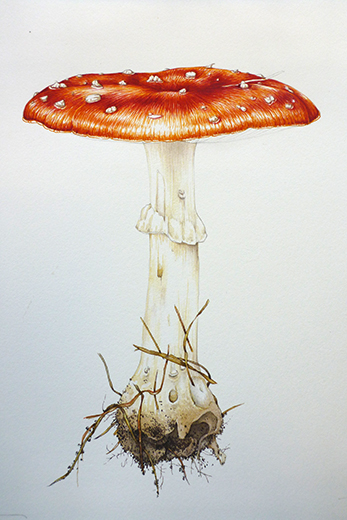
Adding a top wash: An error of judgement?
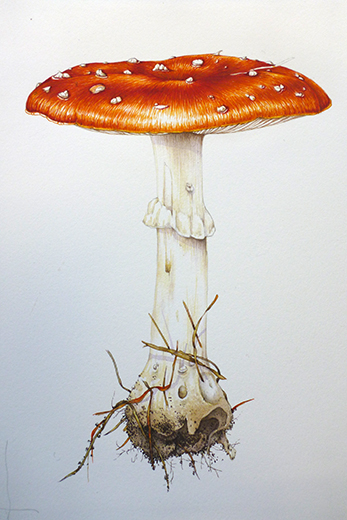
I think perhaps my next step is an error. I usei a light wash of Doctor Martin watercolour inks (scarlet plus orange) to add a kick to the cap colour. As always, the lightest region is left white. However, I think it swallows some of the tonal detail of the painting. As a result so I need to go and work into the cap shadows again.
I also introduce a pale drop shadow below the gills and annulus. This is violet, van dyke brown, and a touch of ultramarine.
I also put a very light wash of the cap colour on the base of the stipe. Again, this tricks the eye into including it when you look at the painting.
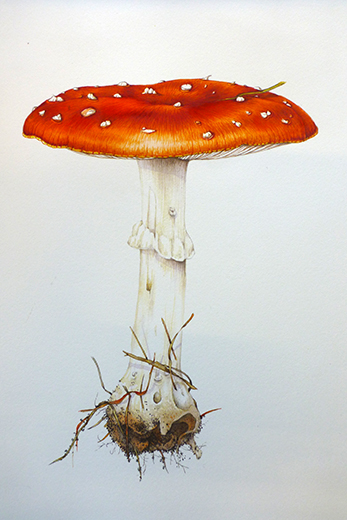
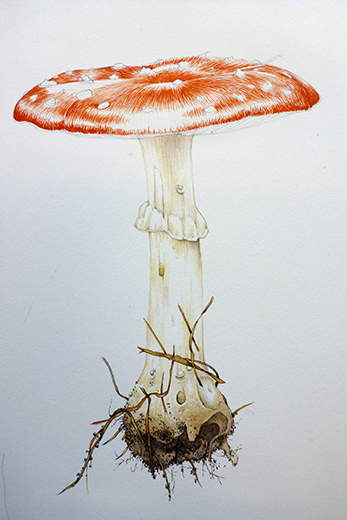
And here’s the final illustration. The colours differ as this is a scan, not a photo. You can see where I’ve worked into the darks again, and finished up the grass blade on the cap. I tweaked the margin of the cap (which is a jazzy pale yellow sliced with scarlet) and darkened the darkest darks (middle of cap, junction with gills, bottom of stipe.)

It was a lovely specimen to paint, and went really fast; I manage to get it done in 5 hours, which is quite quick for me. It’s definitely given me a taste to paint more, specially as the flowers are dying in the autumn rains… For more of my fungal illustrations, check out my blog.
Such beautiful work and THANK YOU for your generosity in sharing how you did this. For us beginners this is really helpful. Cheers Bev from down under
Bev, Im really glad it helps. It’s like everything, if you take it one step at a time it becomes far less challenging! Happy painting and thanks for taking the time to leave a comment.
This is so beautiful Lizzie! I really want to paint one. Having such trouble getting colours correct but now, thanks to you I can have another go. Just got to find a mushroom! Thank you for your really generous help with achieving my goal xx
Hi Anita
I know, colour mixing can be so tough! And somehow getting the reds bright but with tone is a real challenge. Too light and it looks orange, too dark and it looks purplish crimson. Hey ho, it’s the burden we have to carry, eh? Fingers crossed you find a gorgeous Fly agaric this autumn, and that you enjoy painting it as much as I did. Thanks so much for taking the time to leave a comment! Yours, Lizzie
Hi Anita, absolutely love your paintings, I also love the breakdown of the drawings, i’m Just starting to learn how to draw & paint so I need all the help I can get. I really love botanical drawings, to my thinking people who draw and paint at that standard are at the top of the game. And you are at the top, all the best, Barry.
Hi Barry
What a generous and kind comment. I think it’s all down to putting in the hours, to be honest. I’m glad the breakdown of the process is useful and interesting, Im always intregued by the mechanics behind other botanical illustrators work so it’s good to know sharing mine is a good idea too. I’d also say, at the start, never compare your work with the image you have in your head before you begin! They never line up (nor for me, either) so just keep at it and, liek learnign any new language, you’ll find your drawing and painting skills get better and better.
Hi Lizzie, I am making a mushroom lampshade out of paper mache and was looking for the right colors. Coming across your site is a blessing. I have always loved botanical drawing and thought of doing so. You are an encouragement. Thank you so much for the step-by-step color process. Although I do not have the colors you used, they help me with my color decisions.
Best to you and enjoy art!
Frances
Hi Frances
Your mushroom lampshade sounds like a glorious project! And colour work is incredibly tricky, and can be quite personal too. I’m really glad the blog has helped with it. Thanks for such positive feedback, it’s lovely to know that you can be of use. And good luck with the lampshade, I bet it’ll be stunning. x
Excellent commentary. The other day I found this site and wanted to let you know that I have been gratified, going through your posts. I will be signing up to your RSS feed and will wait for your next post.
ThankyoU!
Great to hear, thankyou!