

Landscape Illustration: Malham Cove

A natural history illustration job I’ve been working on recently is two large landscapes for the North Yorkshire Dales National Park. These are to go on a desk in their visitor centre in Malham. Each landscape focuses on bird species found in two different habitats. One of the landscapes is a view from the desk, into their wildlife garden. The other is a view of Malham Cove.
Although I am able to paint landscapes it’s not something I ever feel confident or complacent about. Illustrating the dramatic cliffs at Malham were no exception.
Pencil rough
The first step was to get a decent pencil rough drawn up. This involved putting the birds within the landscape. I used a light projector (the Designmaster II) to help draw up the landscape (from photo reference), and then to get the birds to scale. The projector allows you to enlarge or shrink images, which is incredibly useful.
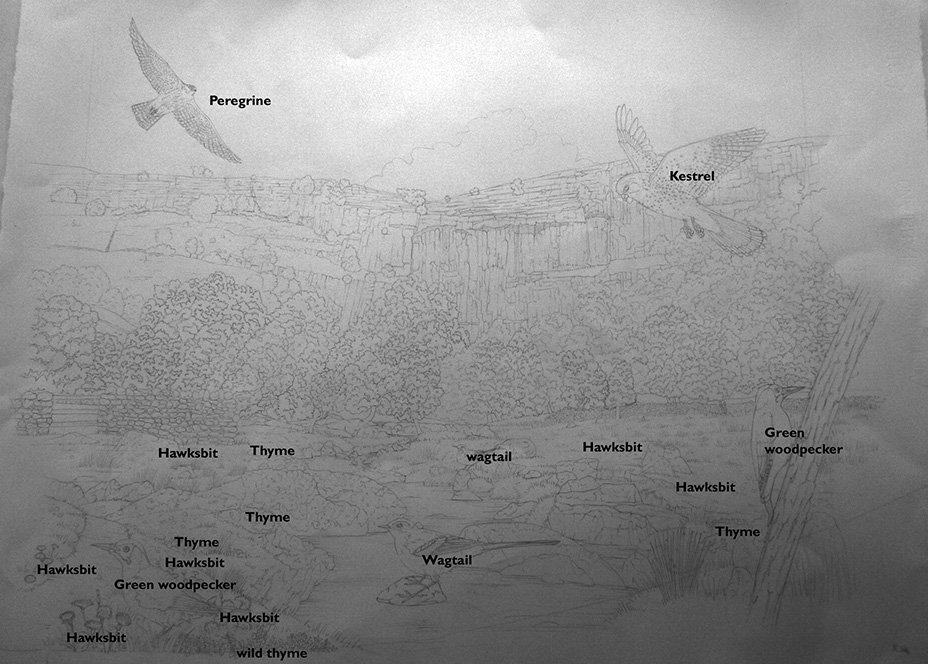
Annotated pencil rough of Malham Cove with bird species (and plants) commonly seen there.
Once the pencil rough was accepted, I could begin to paint the landscape. First, I had to add some low lying plants.
Painting the landscape: Cliff and trees
I began by covering the entire page (a large area – these landscapes are 120cm x 60cm!) with a blue wash, “sky”. This is a deeper hue at the top of the page. I use tissue to lift the colour from some areas, leaving clouds. Bringing the pale blue over everything except for the closest foreground means that these elements jump out at the viewer, it helps unify the rest of the painting.
Next I plotted in the cliffs, using a very pale greyish blue wash on the areas of shadow. Much of the cliff face I left untouched – it was already pale blue from the wash used to paint the sky. Adding pale purple to give depth to the shadows came next. I painted the distant trees using a variety of greens, all very watery. Keeping most of the areas of detail on the right hand side of each tree gives the suggestion of a light source.
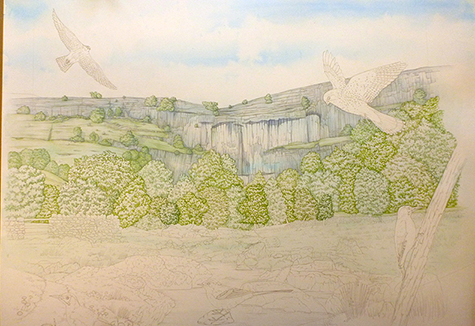
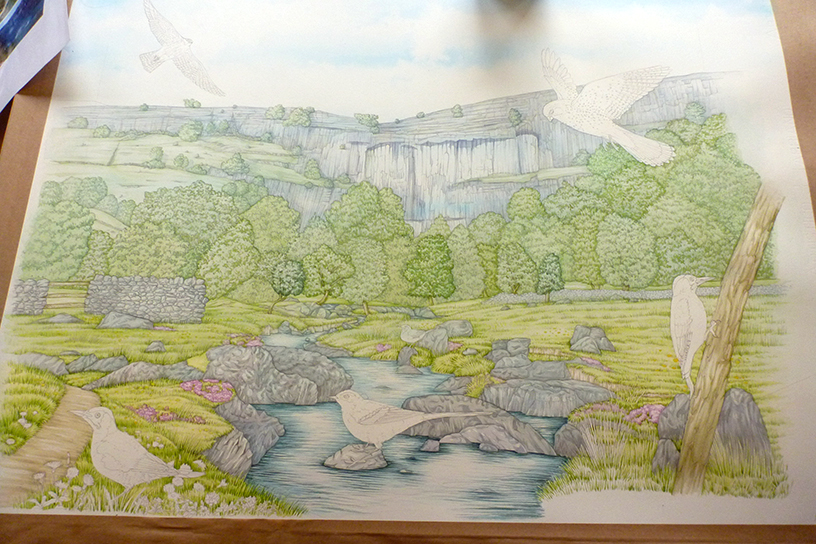
Malham Cove illustration in progress
Painting the landscape: Turf and grass
Next up is the expanse of turf which doesn’t take nearly as long as you might think. I add a series of green washes, getting more saturated and yellower as you move to the foreground. Likewise, the amount of detail increases as you come towards the foreground. Individual grasses are painted in the closest foreground area.
The stones in the stream get painted too – a variety of yellowish and greenish greys (all the stone near Malham is predominatly limestone), just in the shadows of each boulder.
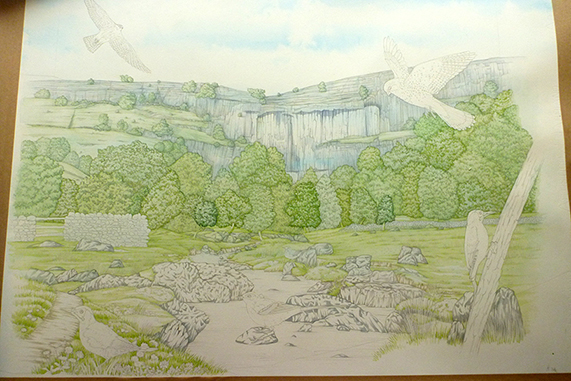
Painting the landscape: the stream
Malham Cove illustration in progress
The next stage is to get some of the water painted in, which is terrifying. In order to make an area look like water you need to preserve plenty of white, but at the same time paint the glittering vivid blue-green shadows found in any Yorkshire beck. I tend to put down a dark greenish brown first, then the same colour again mixed with some prussian blue, and finally another layer of very pale cerelean blue. I make sure all my brush strokes are tiny, and all are horizontal. Darkest areas are those abutting the land, or features in the water. I also put a pale grey unifying wash on the boulders in the stream, and picked out a few of the darker shadows on the stones with a watery purple wash.
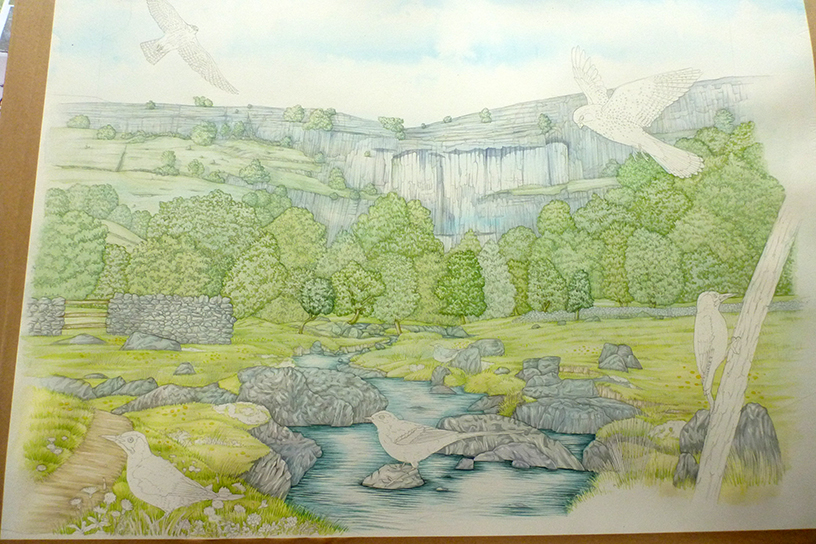
Malham Cove illustration in progress
Adding depth to the landscape
At this point the landscape begins to look like a jigsaw, with the birds and flowers needing to be painted in, like the missing pieces.
More depth is added to the grass and plants in the foreground, and the trunk of the tree the woodpecker is perched on gets painted.
Adding the birds
My favourite part of the process comes next, when I breathe a sigh of relief. I get to start painting the birds. Woodpeckers and wagtails appear in their painted landscape.
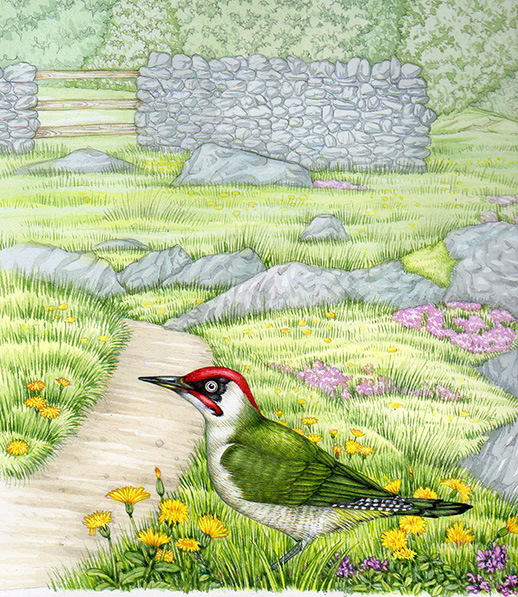
I also get the flowers painted. I keep the most detail for the plants closest to the front of the painting.

Here’s a detail of the Green woodpecker on the floor which also shows my approach to the flowers at the bird’s feet.
Painting the birds in the sky
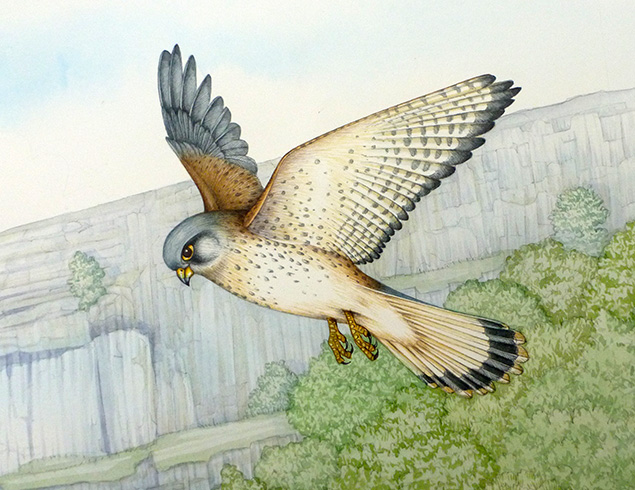
Next up are the birds in the sky, the kestrel and the peregrine. The Peregrine first. (I prefer to lean on the space where the kestrel will appear instead of on a finished illustration. I always rest my painting hand on a sheet of paper to protect the painting or paper underneath.)

Peregrine detail, flying in front of Malham Cove
Then the Kestrel. Lots of blues and browns, and yellow ochre on the areas of white feathers.
Finishing up
The final thing to do is to empahsize the darks and lights in the foreground. I do this by adding purple and blue washes to the shadows.
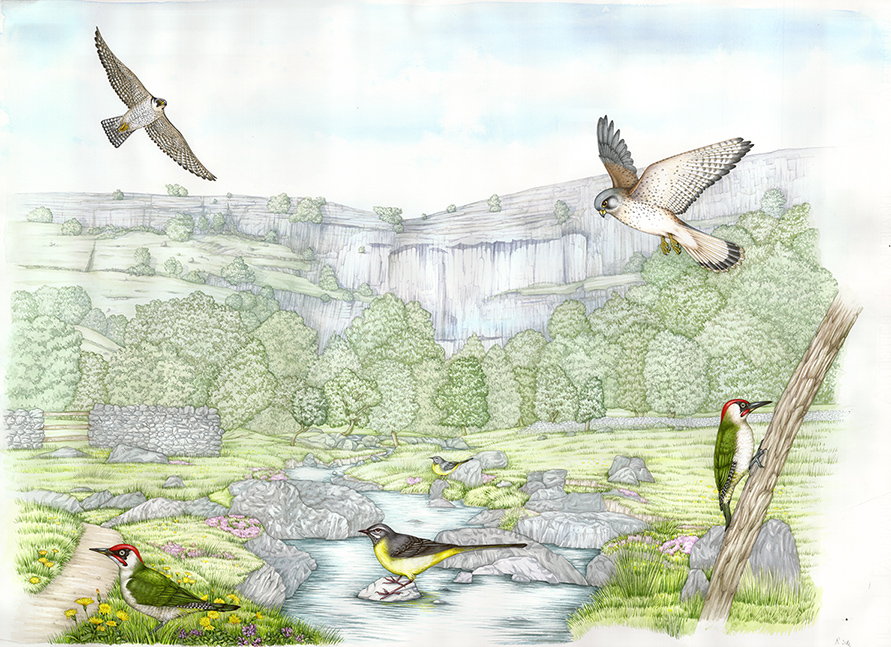
Finished natural history illustration of Malham cove and associated bird species.
Some details
Here’s another couple of details of the birds.
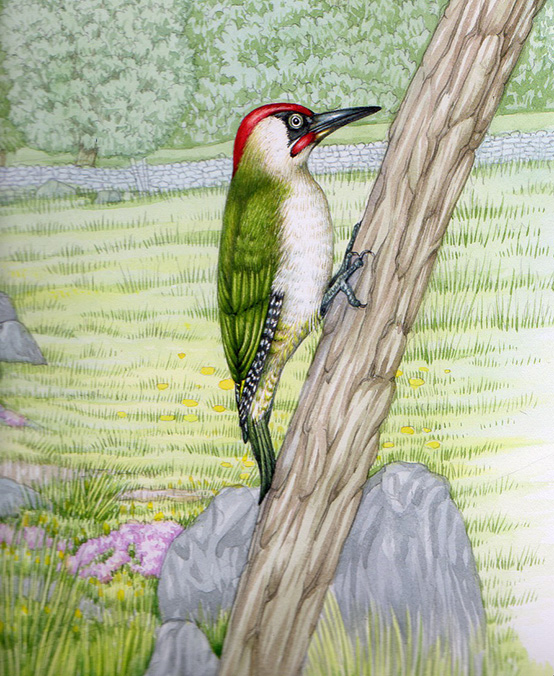
Green woodpecker on a tree
Here’s a detail of the Grey wagtail (which also shows my approach to painting water, and where I’ve popped in the bright cadmium yellow of the Wagtail chest into the reflections in the watre).
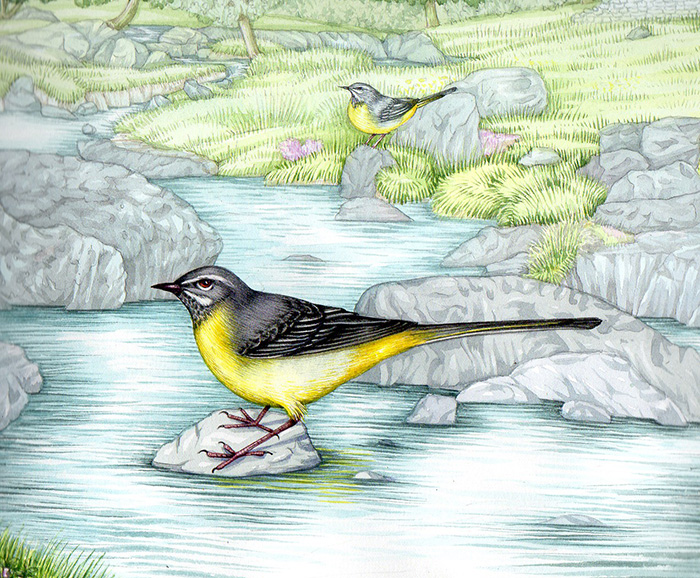
Grey wagtail in front of Malham Cove.
Due to the massive size of this landscape, it was a tough job. However, it was hugely enjoyable, and the sense of relief when I got it completed without having messed it all up was enormous!
For more step by step landscapes, have a look at my Hartslock nature reserve blog.