

Step by step botanical illustration of a Holly leaf
As it’s Christmas time, I thought it might be a nice idea to do a seasonal step by step blog. Holly leaves are one of the few winter subjects that look just as good in the middle of winter as in summertime, and since they’re pretty easy to come by and defiantly seasonal, I chose to work with the holly Ilex aquifolium.
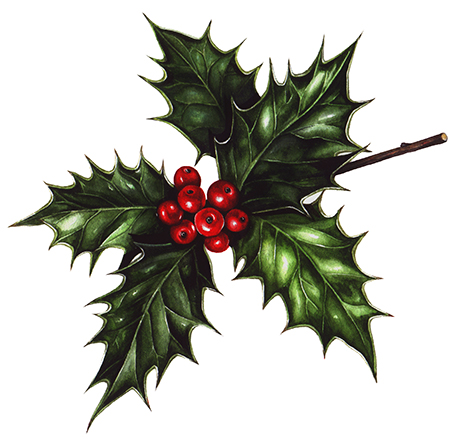
I decided to work up one single leaf, and found it remarkably tricky! However, here’s my best attempt at painting a leaf and at breaking it down into easy to follow steps. (If you can find a sprig with a red berry on, then you’re all set to make a really lovely illustration.)
In theory, this approach should work for any shiny leaf.
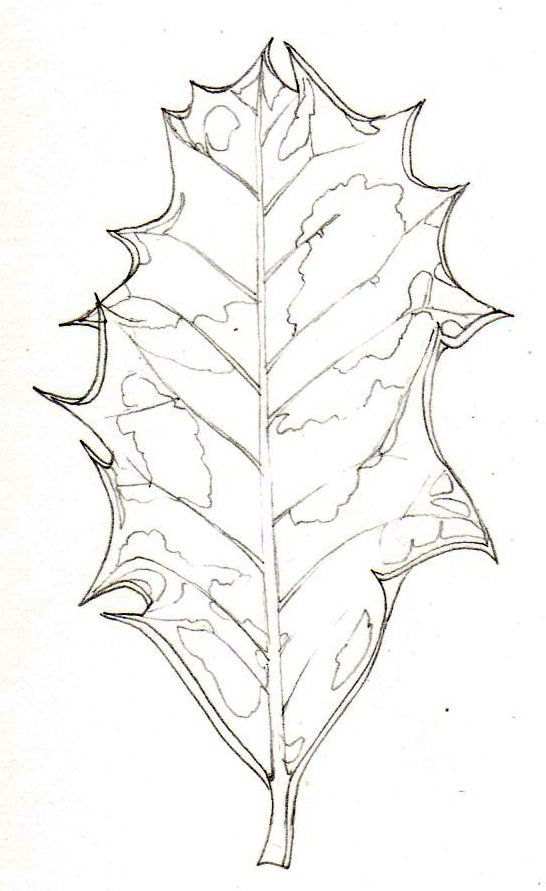
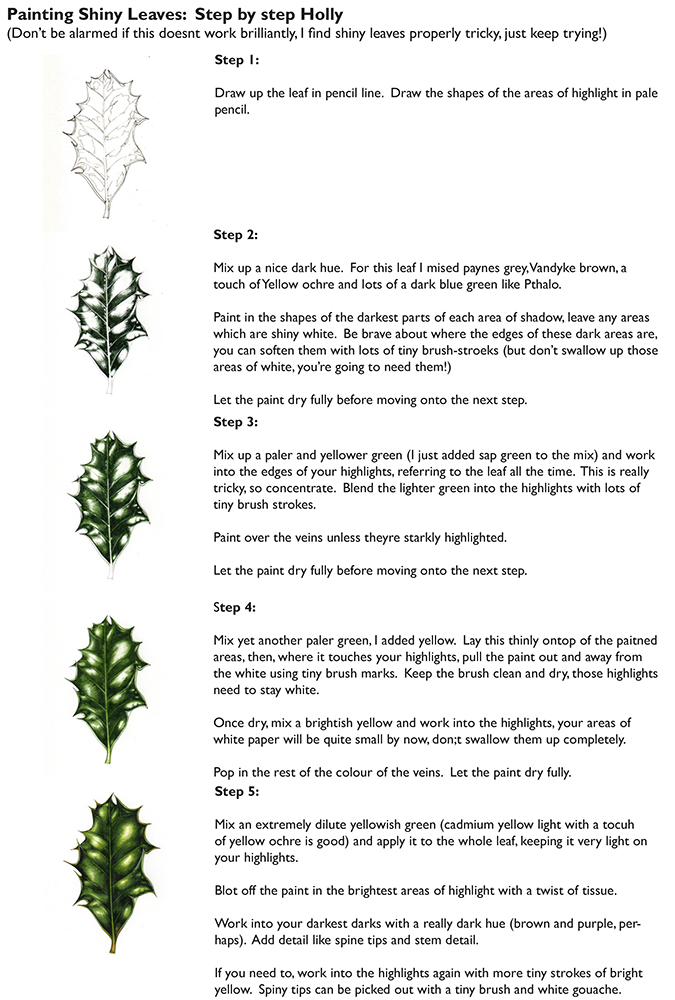
Step 1:
Draw up the leaf in pencil line. I like to use mechanical pencils, the Pentel P205 is a firm favourite. Draw the shapes of the areas of highlight in pale pencil too.
Step 2:
Mix up a nice dark hue. For this leaf I mixed paynes grey, Vandyke brown, a touch of Yellow ochre and lots of a dark blue green colour like Pthalo green and blue. Mix the paint nice and thick so it has real solidity about the colour, but not so thick that it’s too dry to go on smoothly. I use Winsor and newton paints and always use a Winsor and newton series 7 sable brush (normally a number 1).
Paint in the shapes of the darkest parts of each area of shadow, leaving any areas which are shiny as white paper. Be brave about where the edges of these dark areas are, you can soften them with lots of tiny brush-strokes but don’t swallow up those areas of white, you’re going to need them!

Let the paint dry fully before moving onto the next step.
Step 3:
Mix up a paler and yellower green (I just added sap green to the mix) and work into the edges of your highlights, referring to the leaf all the time. This is really tricky, so concentrate. Blend the lighter green into the highlights with lots of tiny brush strokes.
Paint over the lateral veins unless theyre starkly highlighted.
Let the paint dry fully before moving onto the next step.
Step 4:
Mix yet another paler green, I added yellow. Make this paler by diluting it slightly with water. Lay this thinly ontop of the painted areas, then, where his yellow colour touches your highlights (white paper), pull the paint out and away from the white using tiny brush marks. Keep the brush clean and dry, those highlights need to stay white.
Once dry, mix a brightish yellow and work into the highlights, your areas of white paper will be quite small by now, don’t cover them up completely
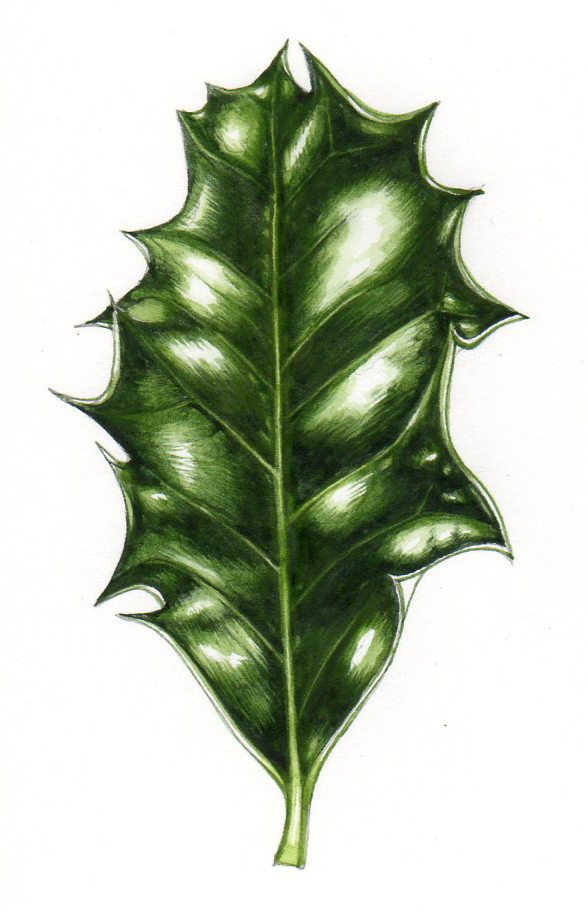
Pop in the rest of the colour on the veins and work into the stem of the leaf. Let the paint dry fully.
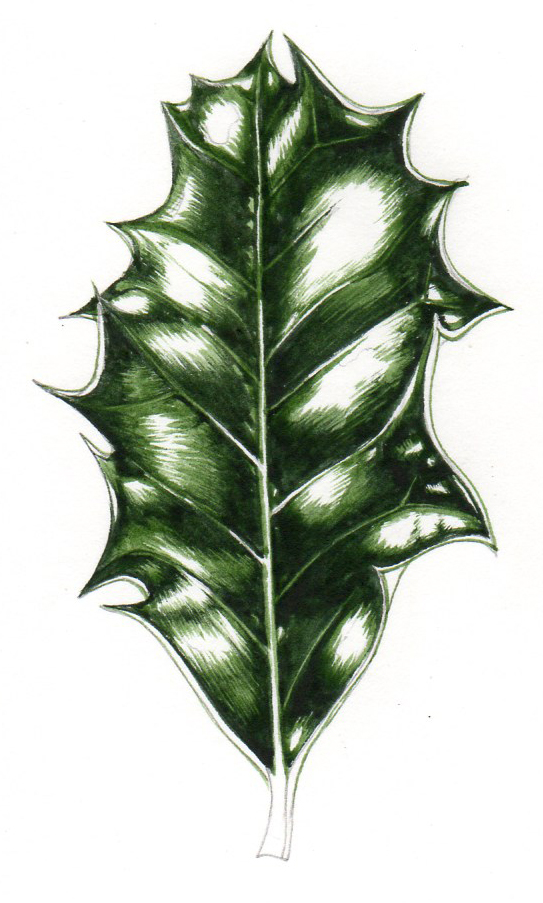
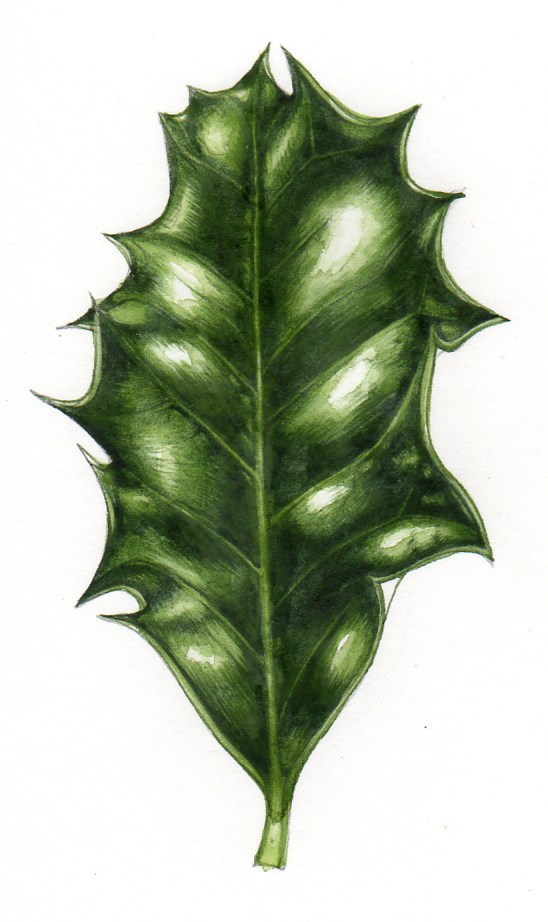
Step 5:
Mix an extremely dilute yellowish green (cadmium yellow light with a tocuh of yellow ochre is good) and apply it to the whole leaf, keeping it very light on your highlights.
Blot off the paint in the brightest areas of highlight with a twist of tissue.
Work into your darkest darks with a really dark hue (brown and purple, perhaps). Add detail like spine tips and stem detail. You can pick out the sharp tips of prickles with a tiny dark line of paint, and look at your leaf to see where the veins have cast shadows alongside them.
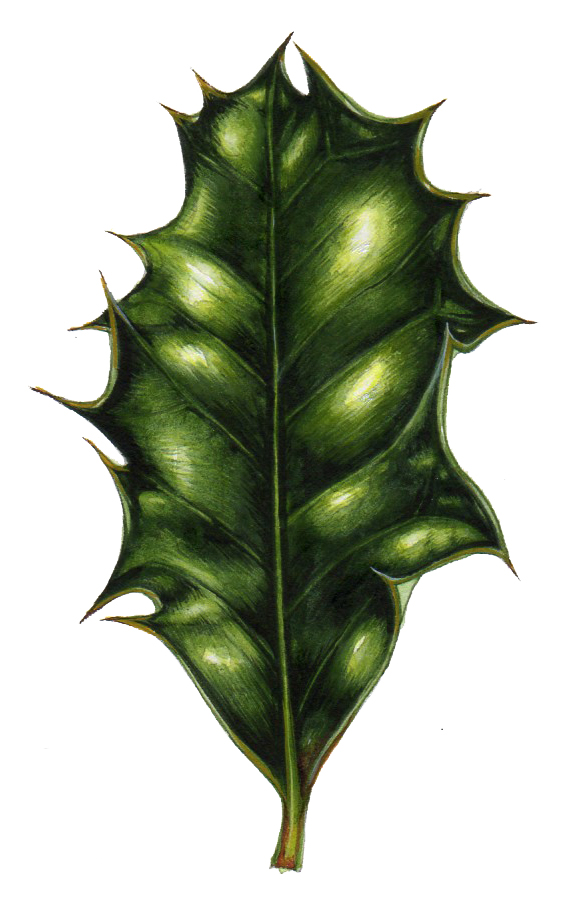
If you need to, work into the highlights again with more tiny strokes of bright yellow. Spiny tips which are white can be picked out with a tiny brush and white gouache, but go easy on the gouache as it can make a leaf look milky or chalky.
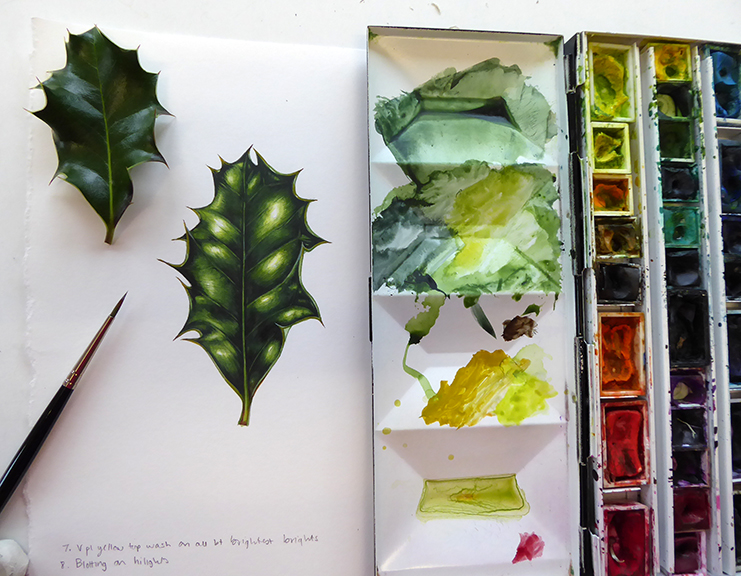
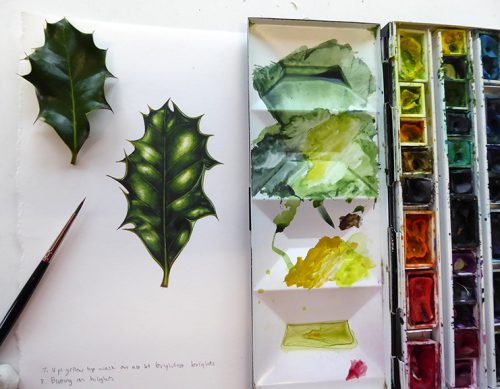
Here’s the finished leaf study along with the leaf itself and my paintbox. I wasn’t delighted with this study, and think there’s definitely room for me to improve on this technique; however, as a basic way to start painting a shiny leaf I hope it has some value. The light on the leaf differs from my angle of drawing, but overall I think the leaf could afford to be darker and less bitty.
Looking at the paintbox
In my paintbox you can see most of the colours mixed for this study; at the top there’s some dark green which was the original paint on the darks, the second palette area has the lighter greens and the yellow greens used in steps 3 and 4, the third palette has yellow hues which were used to work into the edges of the highlights, and the bottom palette is the dried out ochre wash that was laid over the whole leaf. Darkest shadows were provided by the dark colours in the second and third well of my mixing palette, and that tiny patch of crimson was used for the base of the stalk and some tiny regions around the tip of each prickle.
<y other step by step botanical illustration blogs can be found here.
Preparing handouts of the step by step process
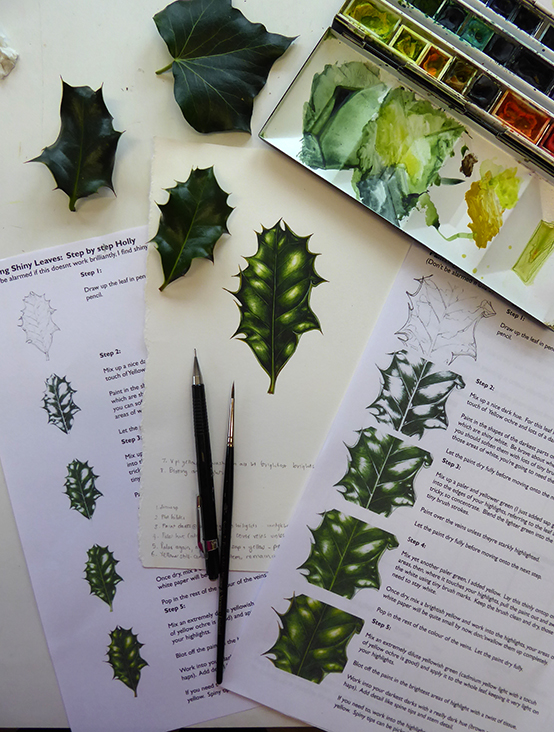
This is me thinking through and preparing a handout (two handouts) of this process. One is below, the other version of the holly handout (with close ups of an area of leaf) can be found on my “step by step handouts” board on pinterest. Feel free to print these off it it helps, but please only use them for your own personal learning. Thanks. I was clearly also thinking of doing a step by step of an ivy leaf, but think that can wait for another day!
For plants that interest you, like the Holly, in addition to collecting and drawing them, you can also make them into Custom Lapel Pins. I did this with an Oak lead illustration and with a Fly agaric, and they are lovely!
And finally. can I wish all of you a very happy holiday season, Christmas, Hannukah, New Year and 2018! Thanks for your interest in my work and blogs, and for taking the time to read my ramblings.
Good
super illustrations and very descriptive in your how to paint the leaves.
Hi Frank
Thanks for this, Im glad it was useful
Lizzie