

Field Vole step by step illustration

A recent natural history illustration commission was to paint a Short-tailed or Field vole (Microtus agrestis). This natural science illustration is for an information board to be erected in a nature reserve.
Illustrating voles
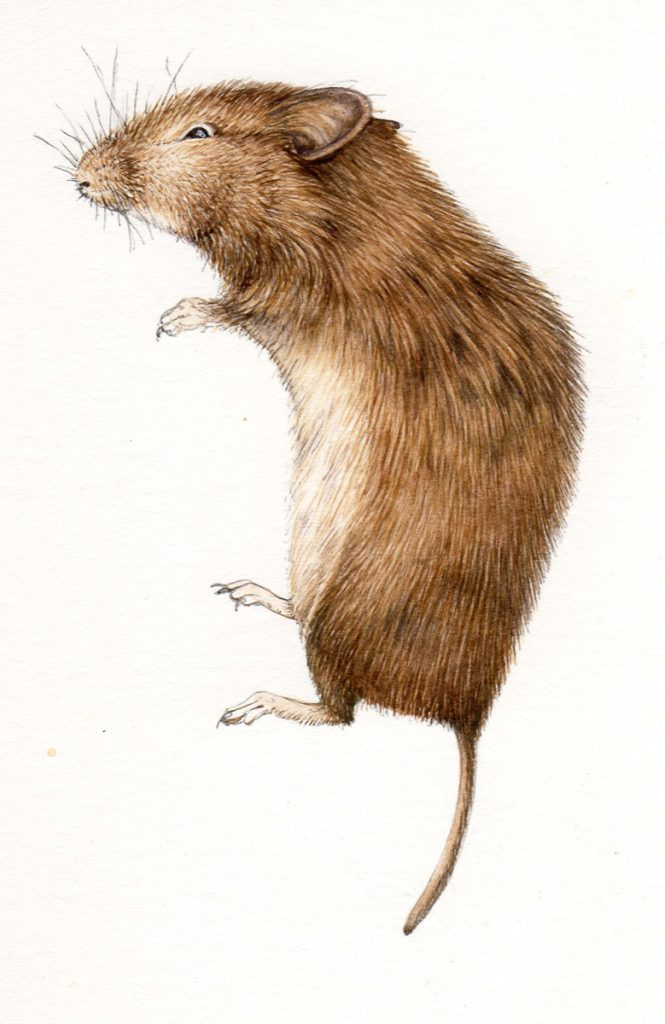
I’ve painted voles before, and I’ll be brutally honest and acknowledge that these illustrations have been far from my best. Voles are small and fluffy, and they tend to hold themselves hunched up. This makes them quite tricky to capture in an illustration as any defining features are hidden in curled up fur.

Embarassingly awful Field vole illustration done in the mid 1990s
However, this vole was going to look better. I was fortunate in that a neighbour’s cat had brought in a dead Bank vole a few weeks before this commission came in, and I’d had the opportunity to do a decent sketchbook study of the animal, and especially of the way the fur lay on the vole’s body. The colours in this study weren’t particularly useful as Bank voles are far redder than the Field vole, but in terms of structure the sketch was invaluable. (I did return the vole to the cat once I’d painted it).
Sketchbook study of a Bank vole
Assembling reference and drawing up the vole
I was lucky enough to have access to some rather good photos of the vole in the wild too. There are many benefits to being on good terms with wildlife photographers. For me, being allowed to use some of their photos for reference is key. It’s all very well having dead voles in the freezer (which I do, and these are vital for fur colour reference). But these photos of the animals in the wild are extremely important too.
The first thing I do when working on an illustration is to draw the animal in atonal pencil. Just a simple line drawing. I love working with mechanical pencils like the Pentel P205. I work directly onto the hot-press watercolour paper. Ill be painting on Fluid 100 , a rather fine paper which I now use as a replacement for Fabriano. For more on this please check out my blogs (blog 1, blog 2, blog 3) comparing watercolour papers. They’re also available as Youtube videos (Video 1, video 2, video 3).
This pencil drawing is sent to the client who can give feedback and ask for alterations.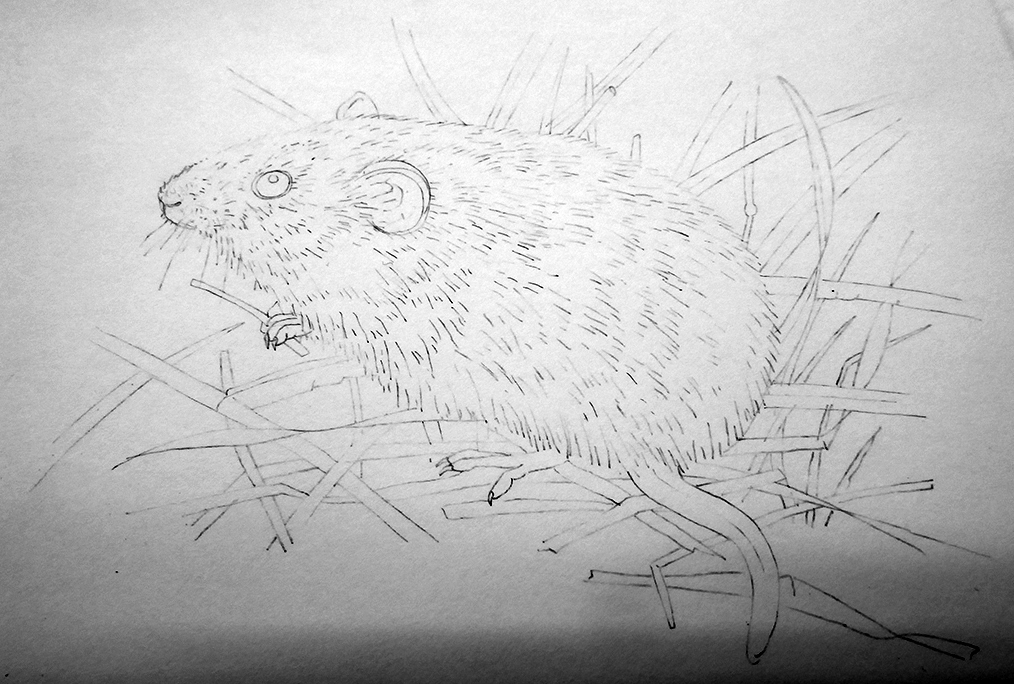
Pencil rough of the Field vole
Painting the background
Once I’ve been given the go-ahead, I tend to focus on the background. I think it’s important to take the background as seriously as the subject of the painting itself, so I painted these grasses as true to life as possible, they’re all common British species. Where they overlap and cast shadows on one another I use a shadow of purple and blue which helps clarify what’s going on in the illustration. As always, when mixing greens I’ll use ready-made paints from their pans (such as Sap green) and mix in various yellows, oranges, blues, purples, and almost always a little yellow ochre. I keep written and visual notes of these mixes so I can replicate them.
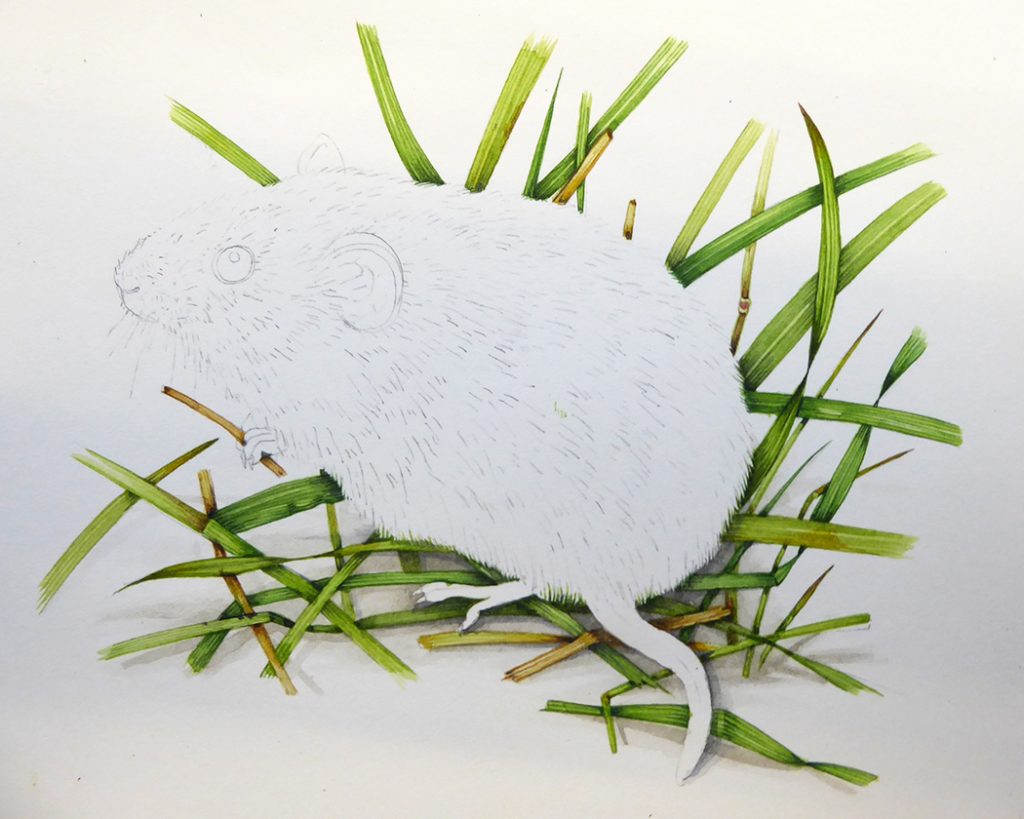
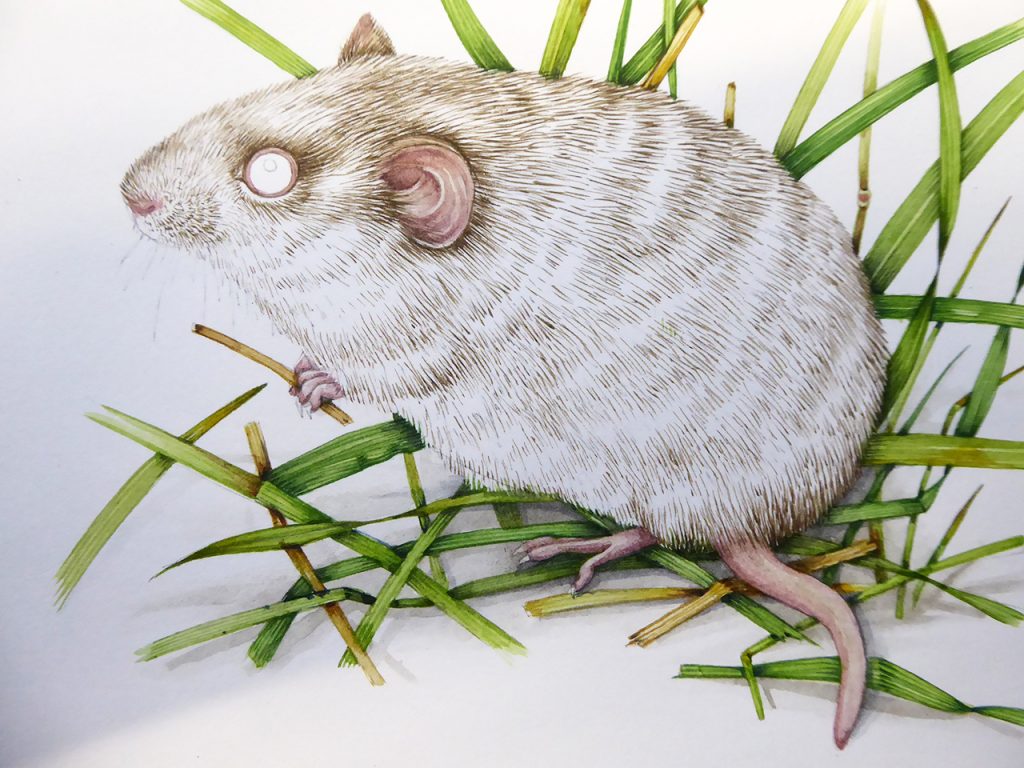
Field vole with background grasses illustrated
Painting the darkest areas of the fur
Moving onto the mammal, the first thing I pick out is the darkest areas of fur, I use little strokes, and try to give the animal form by plotting where the darkest areas of fur are. I always use a Winsor and Newton Series 7 paintbrush (normally a 1 or a 00) because not only do these brushes hold their sharp and accurate tips, but they also hold enough paint to allow me to paint a fair amount before having to pop the brush back into the paint mix and thus disrupt the flow. For the vole, I used a mix of yellow ochre, purple, brown, and a touch of cadmium orange light (I tend to use Winsor and Newton watercolours, but am happy to use other brands too.)
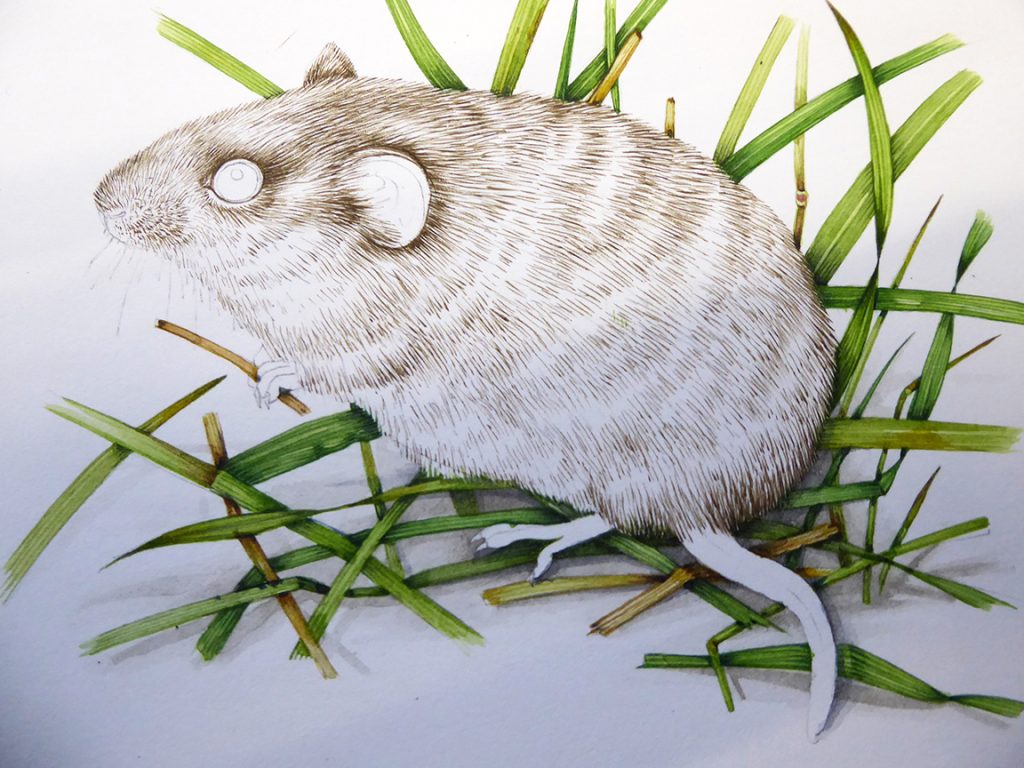
Painting in the darkest fur on the Field vole
I build into the darkest regions with repeated little brush strokes, especially around the eye, ear, and rear of the vole. I also mix up a slightly grey pink and, using a watery tint of this colour, I pop down the pink that you can see around the eyes, on the tail, on the paws, and on the nose of the animal. It’s important to blend this is a little, there’s no sharp definition between these areas and the fur on the vole itself. The illustration has to echo this.
Ears, paws, eys ring and tail plotted in
Painting the fur
Next, I mix up a slightly lighter fur colour. This mix includes a higher ratio of yellow and yellow ochre, and is a little paler than the initial brown. I layer this on top of the first layer, and make sure the length of my brush strokes relate to the length of the fur on the animal. Very short strokes are required around the muzzle of the vole, longer ones on the body. This colour is also useful as you can layer the fur along the tail, thus easing the visual transition between the fur and the skin of the tail.
The chest area is leaf white as Field voles (like many mammals) have paler stomach and chest regions than the fur on their backs.
I now do what I almost always do: get carried away and forget to take progression photos. Apologies.
First, I work into that pale chest and belly fur, introducing areas of blue grey. I continue these into the fur on the rest of the vole. When you look closely at it, the vole’s fur is brownish above with a soft grey under-layer. My painting tries to emulate that.
Next, there’s another layer of even paler brown fur that carries across the whole vole. Yellow ochre and orange, and a light touch are required for this.
Finally, a very light and wet top wash covers the whole animal (and gets blotted off the stomach almost immediately). This unifies the look of the creature. I make sure the tail, paws, and ears are touched with this too.
Adding the final details
Finally, the minute details which help pull the illustration together. Tiny claws, the eyes, the nostrils, and the whiskers.
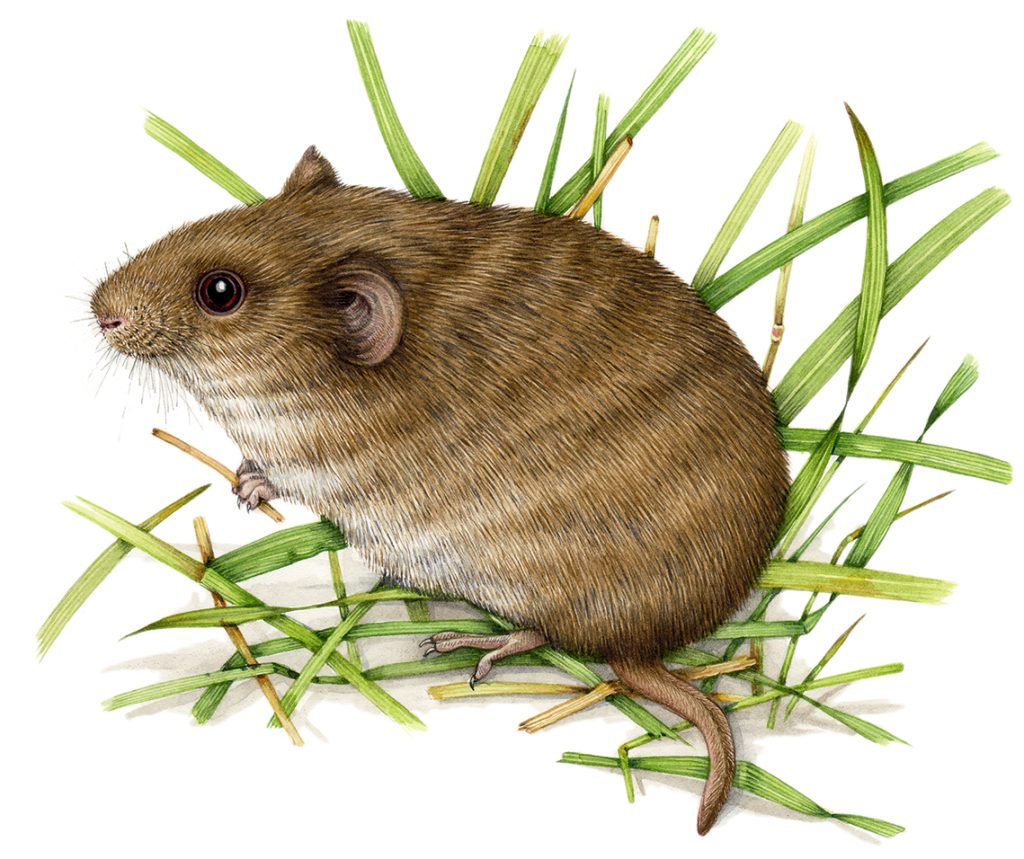
Finished Field vole, Microtus agrestis.
A lot of illustrators will always do the eye first; if you mess up the eye the whole painting is destroyed. I always leave it ‘til last, I’m not sure why. I think I enjoy the “magic” of bringing an animal to life at the very end of the illustrating process. Rather like painting the leaves and saving the flowers until last, I think doing the eye is the treat that makes the picture feel complete. I guess it ties in with me always leaving the tastiest morsels on my plate until the end of a meal…saving the best ‘til last!
Hopefully this blog explains the steps involved in completing a natural history illustration of a small mammal. I, for one, am much happier with this vole than with the rather embarrassing attempt shown at the top of this blog. At least I’m getting better with age, what a relief!
For more animal step by step illustrations, follow the link.