

Scientific Illustration: Pen and Ink Techniques
As a scientific illustrator, you need to be able to feel confident using pen and ink. Often pen and ink is the best medium for a diagram as it’s exact and clear. Other times, commissioners like the traditional look of pen and ink illustrations. This week and next week’s blogs are an overview of what you can achieve with pen and ink, and how to do so.
Line work
Before being able to work into tone in pen and ink, you need to be confident of your lines. Try to use long and confident lines; a good way to practice this is to sketch with ink pen instead of pencil for a while.
You could also go over pencil lines with ink, trying to follow them accurately.
Drawing permanent ink lines accurately, and not being able to disguise errors with tone is really tough; but required for diagrams. Computer programmes are a great help, although I still do my work by hand.
Different pressure, different strength of line
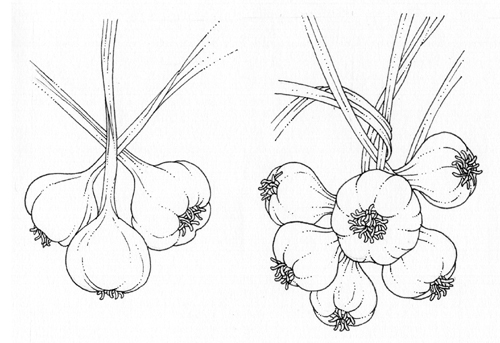
You can darken a line by pressing harder, and lighten a line with less pressure. You can even break a line in its palest areas by using a few spots instead of a solid line; the eye will register it correctly and it adds depth. This garlic plait appeared in Alan Titchmarsh’s How to Be a Gardener.
Sometimes these simple diagrams need to be quite complex; just remember that the illustration has to read clearly without any tone. These fruit tree types were also in How to Be A Gardener.
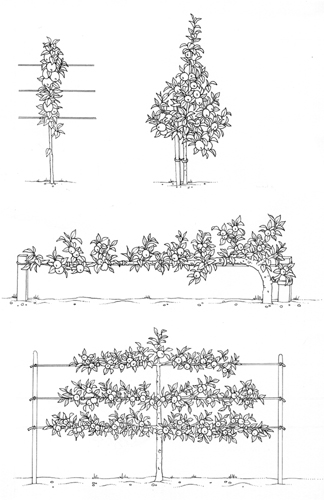
If you’re asked to do an illustration involving straight lines, do use a ruler; trying to draw accurate straight lines freehand is not something I’d relish.
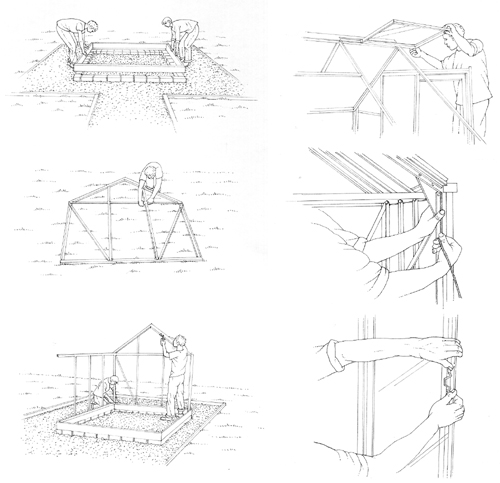
from Alan Titchmarsh’s “How to Garden” series.
Stippling
Stippling is basically building areas of tone with loads of tiny pen marks. Different illustrators prefer to use different marks; I like using tiny dots, others favour short lines, or cross-hatching. The effect is the same in all cases, building up dark areas with ink.
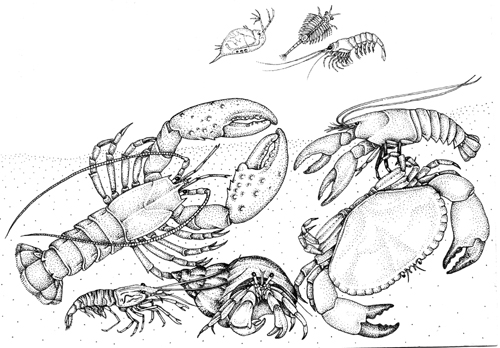
Crustacean family members, done for London Aquarium
Larger pen and ink compositions
Once you’ve mastered line work and stippling, pen and ink can be used to illustrate anything; from a detailed picture of animals to complex landscapes.
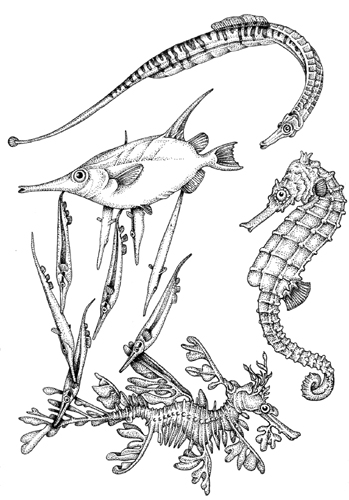
Members of the Seahorse family, done for London Aquarium.
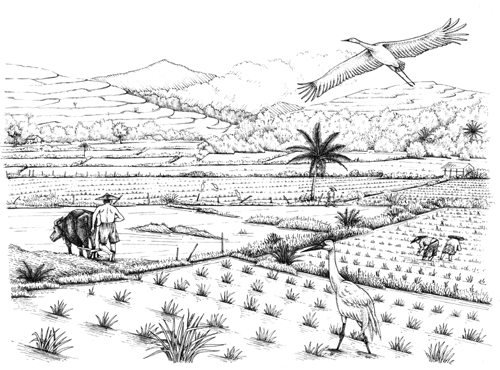
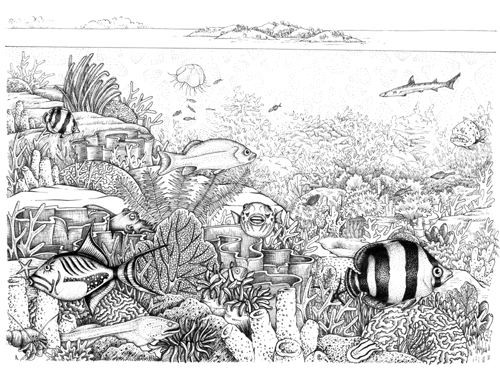
Rice paddy and coral reef scenes done for WWT the Wetland Centre
Materials for pen and ink work
The materials needed to work in pen and ink are really simple. First, you need a pen. I use disposable permanent ink pens with small nibs (0.2, 0.1, and best of all 0.05). Many companies make these (Staedtler pigment liner, Micron Pigma); they’re all good. I work onto high quality cartridge paper such as Daler Rowney HeavyWeight, although many illustrators prefer to work onto board.
Pen and ink technique excersize
As a way to improve technique, try the following excersize.
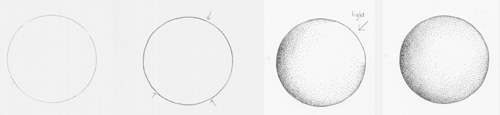
A B C D
Draw a circle in pencil (A), then go over it in ink (B). Try to follow the pencil with one steady ink line. If you need to break the line (shown by the arrows on my diagram), leave a tiny space between it and the next, you can always fill this in with a tiny dot and that looks less clumsy than possible overlap would. Next, using little dots, work in from the ink line to the centre of the circle (C). The spots will be dense near the perimeter, but much farther apart towards the centre. It takes ages, don’t be discouraged. Decide where your light source is (shown by an arrow), and make sure you’re consistent with this. It may help to shade your dark areas with pencil, then rub them out once the ink has dried. Don’t make your areas of light too spotty, and try to keep the spots small. Keep going until you’re satisfied (D). Once you’ve mastered this technique you can draw anything using the same approach.
Pen and ink techniques with colour…next week’s blog
Next week’s blog shows you how to make these pen and ink images work in colour; it’s alarmingly easy. In the meantime, good luck with your stippling; and remember to shake your arm out every 5 minutes or so, it really helps keep the cramp away!
Amazing coral reef drawing
Thanks Cliff. Got to love a coral reef, right? I still have the original kicking around somewhere. I always thought it’d be fun as a colouring in page. thanks for the kind comment. Yours Lizzie