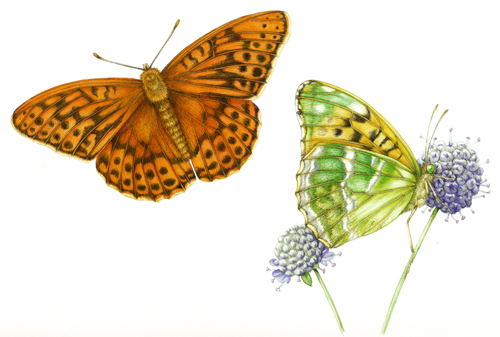
Illustration of Silver Washed Fritillary Butterfly
I’ve been working on natural history watercolour illustrations for Buckinghamshire, Bedforshire & Oxon Wildlife Trust this month, and one of the species they wanted me to paint was the beautiful Silver washed fritillary butterfly, Argynnis paphia.
This butterfly is instantly distinct from the other fritillaries because of the striking markings on its underwings; greens, golds, and some streaks of pure silver (hence the name).
For this reason I decided to show the butterfly from two angles; flying and at rest on a Scabious flower.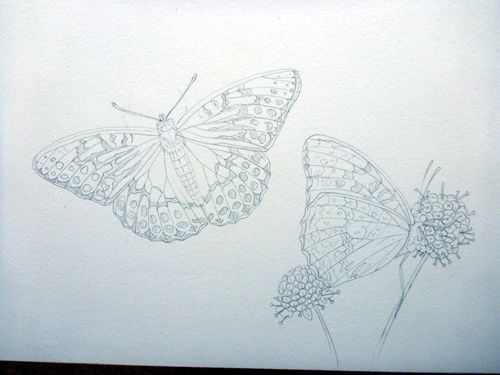
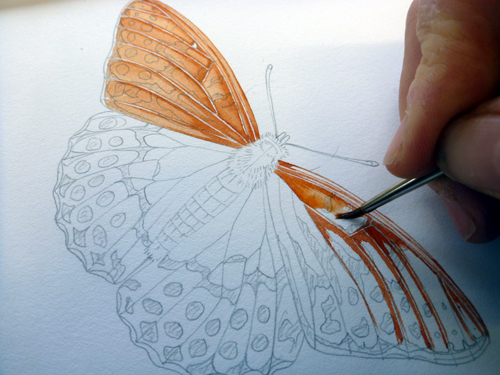
Once BBOWT had approved the roughs, I set to work on the painting; first plotting the wing structure by painting in the veins. These are done in the same colour as the rest of the wing; a brown-orange (cadmium orange light mixed with cadmium red, vandyke brown, and some yellow). I tend to favour Winsor & Newton watercolour paints, and always use their Series 7 brushes (in this case a no.1). My paper is fabriano artistico (hot press) and for drawing roughs I love Pentel’s P205 mechanical pencils (0.5mm HB leads).
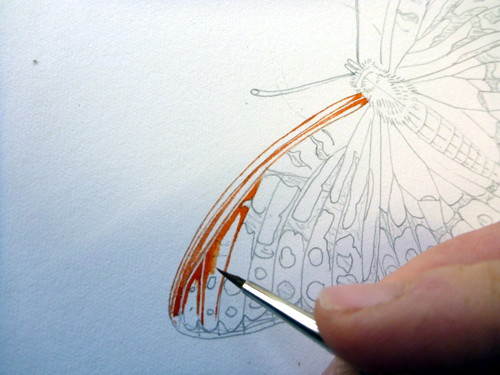
Adding a colour map to the butterfly wing
Next, I blend the edges of these onto the wing cells, using a dilute mix of the paint. I try to keep the centres of each wing cell palest.
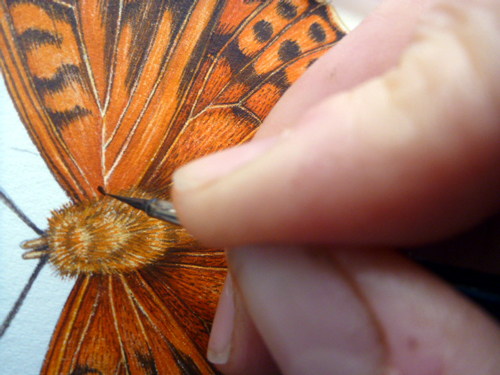
Once the whole of the animal is blocked in with its wing base colour, I start on the body, using tiny strokes to build up colour (and the impression of fur) on the thorax and abdomen. The palette is similar, but with a more brown.
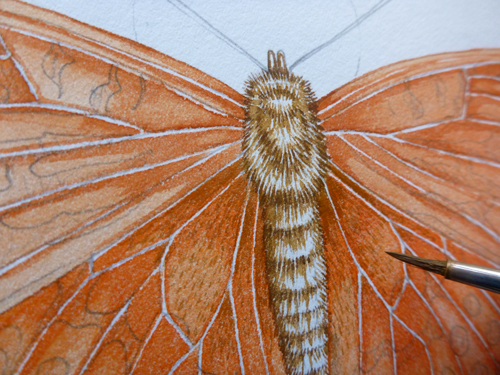
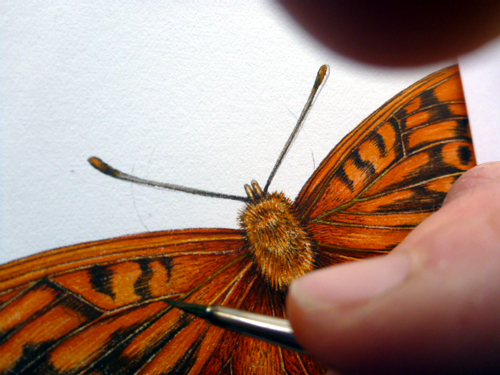
Once I’ve got some work completed on the thorax, I return to the wings and plot in the areas of darker colour. This is a mix of vandyke brown, ultramarine, and a touch of orange so it works with the base colour.
Top wash on the butterfly wings
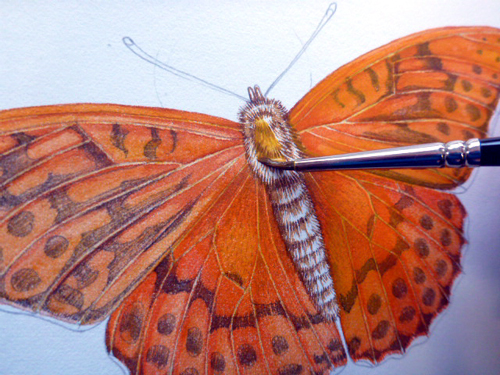
Then I unite the body and wings, and blend in the darker markings on the wings by putting a wet orange-yellow wash over the whole creature (including the wing veins).
Working into the detail of the butterfly wing markings
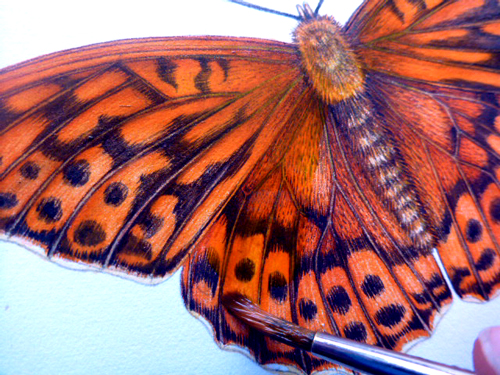
Basically, from here on it it’s a matter of returning to the same areas repeatedly, and working further into them to try and get some of that glowing depth of colour and crisp detailing you see in the living specimens.
Here I’ve worked far deeper into the brown markings on one side of the butterfly. I’ve also covered the whole wing surface with tiny bright marks of a deeper orange. This helps give depth and also clarifies the white wing margins. On closer inspection, the wing veins are lined in the same brown as the markings, so I’m fixing that too.
Working into the veins on the butterfly wings
Here you can see the tiny brush marks a bit clearer as I work into the other side of the butterfly.
And again, working into the edges of the veins, and having darkened the area around the thorax to give some depth.
Finishing up: Adding a top was to the butterfly wings
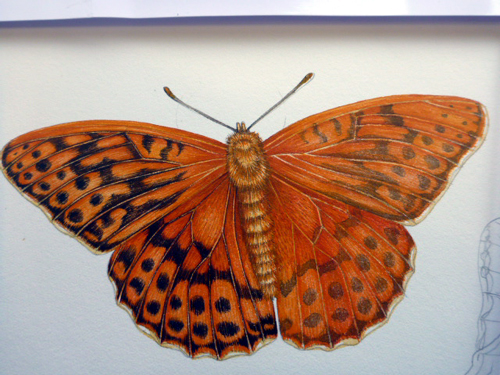
Once the detail is more or less satisfactory, I go over the whole animal with a really rich, wet wash. I love using Doctor Martin watercolour inks for this; they have such clarity and vibrancy. By themselves they can be overwhelming, so I mix them in with my normal watercolour paints to give a little extra power to the colours. They are very fugitive however, so beware of fading. Often I use a much larger brush so I can lay this wash without pulling at the marks below (which can reslut in a muddy mess). This brush is a no. 4 (series 7 again).
Once I’ve tweaked any final areas that need to be darkened, I’m finished. Except for the underside of the resting butterfly! In fact, this was fun as I had to use silver enamel paint since nothing else shone right. Make do and mend. And here’s the finished article: